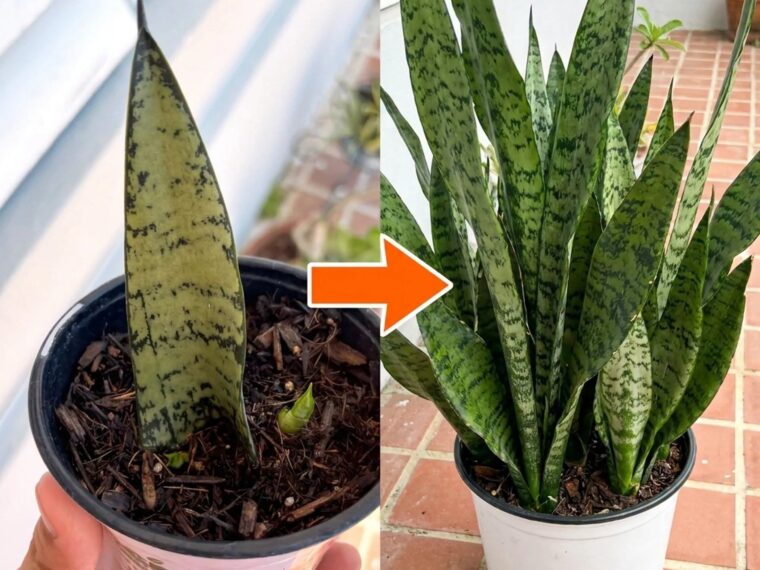


Snake plants are among the easiest houseplants to care for, but did you know you can also create new plants from a single healthy leaf? Leaf propagation is inexpensive, simple, and surprisingly rewarding—although it does require patience.
Whether you have a mature snake plant that has become too large, a broken leaf you’d like to save, or simply want to multiply your collection, these seven tips can greatly improve your chances of success.
Important: Snake plants are now botanically classified in the genus Dracaena (formerly Sansevieria). You may still see both names used in gardening guides and plant shops.
1. Start With a Healthy Leaf
The quality of the leaf you choose has a major influence on propagation.
Look for a leaf that is:
- Firm and healthy
- Free from soft or rotten areas
- Free from obvious pest damage
- Deeply colored and well hydrated
- Large enough to cut into several sections
Avoid leaves that are yellowing, mushy, severely damaged, or showing signs of rot.
If you’re taking a leaf from an existing plant, use a clean, sharp knife or pair of scissors. A clean cutting tool reduces the chance of transferring bacteria or fungi to the wound.
Why does leaf quality matter?
A cutting has limited resources while it develops roots. A strong, healthy leaf contains more stored energy and is generally better equipped to produce roots and eventually new growth.
2. Cut the Leaf Into Sections
You don’t necessarily have to propagate the entire leaf.
A long snake-plant leaf can be divided into several sections, usually a few inches long. However, orientation is extremely important.
Each section has a top and a bottom. The end that was closest to the base of the original leaf needs to remain oriented downward when planted.
A simple trick is to make a small angled cut at the bottom of each section and a straight cut at the top. This makes it much harder to accidentally plant the cutting upside down.
Why is orientation important?
Roots and new shoots develop from specific parts of the cutting. If you turn the section upside down, it may fail to develop properly.
3. Let the Cuttings Dry Before Planting
This is one of the most useful steps—and one of the easiest to skip.
After cutting the leaf, place the sections somewhere dry and shaded for several days. Allow the freshly cut surfaces to callus over before putting them into water or soil.
The exact drying time depends on environmental conditions and the thickness of the cutting, but the goal isn’t to completely dehydrate the leaf. You’re simply allowing the wound to seal.
Why callusing helps
Snake plants are succulents and store water in their leaves. A freshly cut, wet surface can be vulnerable to rot.
Allowing the wound to dry creates a protective barrier and can reduce the risk of the cutting becoming mushy.
4. Use a Very Well-Draining Growing Medium
If you choose soil propagation, don’t use heavy garden soil that stays wet for long periods.
A better option is a loose, well-draining succulent or cactus mix. You can also improve ordinary potting soil by incorporating materials such as perlite or pumice.
The container should always have drainage holes.
Plant the lower portion of the cutting into the medium, keeping it upright. Don’t bury a large portion of the leaf.
The biggest mistake: too much water
Many propagation attempts fail because people assume that more water means faster rooting.
For snake plants, the opposite can be true.
The cutting needs some moisture, but constantly wet soil can encourage rot before roots have a chance to develop.
5. Give the Cuttings Bright, Indirect Light
Place your propagation container somewhere bright, but avoid intense direct sunlight while the cuttings are establishing.
A location near a bright window with filtered light can work very well.
Too little light can slow the process, while harsh afternoon sunlight through glass can overheat the cuttings and cause excessive moisture loss.
The ideal environment
Aim for:
- Bright indirect light
- Warm temperatures
- Good air circulation
- Moderate humidity
- A well-draining medium
You don’t need an expensive propagation setup. Snake plants are remarkably adaptable.
6. Be Patient—Rooting Can Take Time
This is perhaps the hardest part.
Unlike some fast-growing plants, snake plants can be slow to propagate from leaf cuttings.
You may see little happening for several weeks. Depending on conditions, rooting and the development of new shoots can take considerably longer.
Don’t repeatedly pull the cutting out of the soil to check for roots. Doing so can damage delicate new roots and set the cutting back.
Instead, look for signs such as:
- The cutting remaining firm
- New roots developing beneath the soil
- Resistance when the cutting is gently tested
- Eventually, a small new shoot emerging
Remember: roots come before the new plant
A cutting may look exactly the same for quite a while before anything exciting happens above the soil.
Don’t give up too early.
7. Watch for New Pups
The ultimate goal isn’t simply to grow roots. You want the cutting to produce a new plant.
Once the cutting has established roots, it may eventually produce a small pup or shoot from its base.
This is the moment when propagation becomes especially exciting.
Continue providing bright indirect light and careful watering while the young plant develops.
Once the new growth becomes established, you can gradually treat it more like a mature snake plant.
What About Propagating Snake Plants in Water?
TO CONTINUE READING THE ARTICLE PLEASE SEE PAGE 2