That old dresser sitting in the garage, basement, attic, or waiting beside the trash may look completely useless. But before you throw it away, take a second look at the drawers.
With a little sanding, paint, a few furniture legs, some hardware, and a comfortable cushion, an ordinary dresser drawer can become a beautiful custom pet bed for a dog or cat.
The project shown in the image is a perfect example. Several old wooden drawers have been transformed into charming beds with different colors, decorative handles, raised legs, cushions, and personalized signs such as “Woof,” “Cat Nap,” “Princess,” and “Beach Bum.”
The best part? You don’t need to build the entire bed from scratch. The drawer has already done most of the woodworking for you.
Similar drawer-to-pet-bed projects have been documented by DIY creators, and even Zero Waste Scotland recommends repurposing old drawers into dog or cat beds as an example of useful furniture upcycling.
Why Old Dresser Drawers Are Perfect for This Project
A dresser drawer already has the basic structure needed for a small pet bed:
- A solid bottom
- Four sides
- A raised front
- Existing joints
- A defined sleeping area
- A shape that can easily accommodate a cushion
Instead of cutting several boards and assembling a box, you’re starting with a structure that’s already built.
This makes the project particularly appealing for beginners.
You can also customize the finished bed to match virtually any decorating style. Paint it white for a farmhouse look, turquoise for a beach-inspired room, pink for a playful pet bed, or leave the natural wood visible for a rustic appearance.
One documented DIY project used an old dresser drawer, furniture feet, paint, and a coordinating pillow to create a finished dog bed.
What You’ll Need
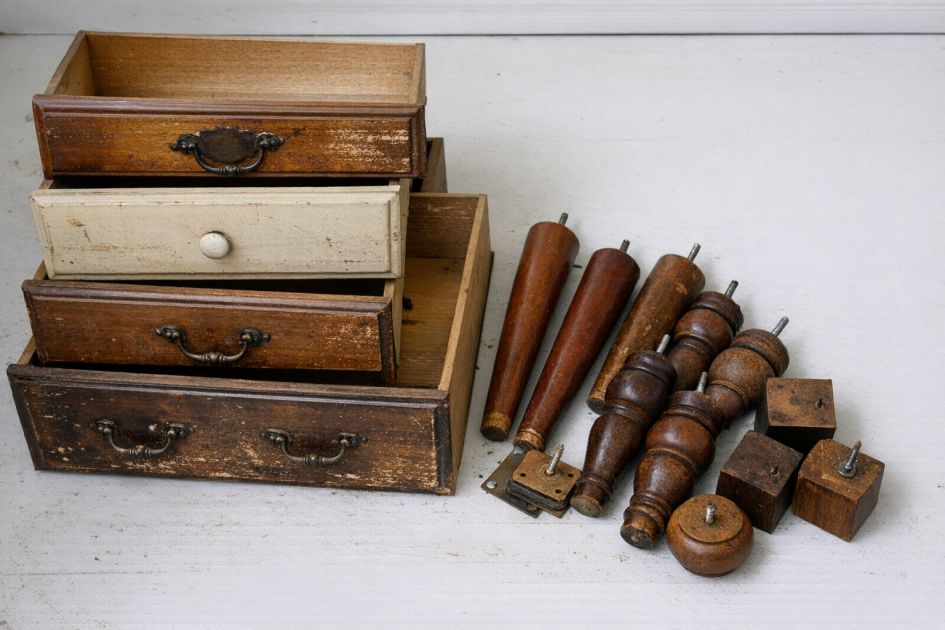
Before starting, gather everything you need.
Basic materials
- 1 sturdy old dresser drawer
- 4 furniture legs or wooden feet
- Leg mounting plates, if required by your chosen legs
- Appropriate screws
- Drill and drill bits
- Screwdriver
- Medium- and fine-grit sandpaper
- Wood filler
- Paint or wood stain
- Primer, if needed
- Furniture-safe clear sealer or wax
- New decorative handle or knob
- Pet cushion or appropriately sized pillow
- Measuring tape
- Pencil
- Clean cloth
Optional decorative materials
You can also add:
- Wooden letters
- A small nameplate
- Decorative paw-print pieces
- Stencils
- Rope
- Fabric
- Decorative trim
- Small wooden stars
- Washable blanket
- Non-slip material for underneath the bed
A documented drawer-bed tutorial similarly recommends an old drawer, sandpaper, paint, new handles, furniture wax, and a cushion.
Step 1: Find the Right Drawer
The first step is finding a drawer that’s worth saving.
Don’t automatically choose the largest drawer.
The most important thing is that the drawer is structurally sound and appropriately sized for your pet.
Look for:
- Solid wood or sturdy furniture board
- No serious cracks
- No loose bottom
- No broken corners
- No exposed nails or screws
- No severe water damage
- No significant mold
- No strong chemical odor
If the drawer has been stored somewhere damp, inspect it carefully before using it. Moisture can contribute to mildew and unpleasant odors in old wooden furniture, so damaged or moldy pieces may require much more work—or may simply be better discarded.
Important tip
If your dog is large, don’t force a tiny drawer to work.
A small drawer may be perfect for a Chihuahua, Yorkshire Terrier, cat, or other small pet, while a larger dog may need a much bigger drawer or a completely different design.
Step 2: Remove the Old Hardware
TO CONTINUE READING THE ARTICLE PLEASE SEE PAGE 2