Step 2: Decide Where the Flowers Will Go
Before drilling anything, place a few artificial flowers against the birdhouse and experiment with the arrangement.
You can position flowers:
- Along the lower front edge
- Around the entrance hole
- On both sides of the front
- Along the bottom platform
- Around the roofline
- In a small cluster under the opening
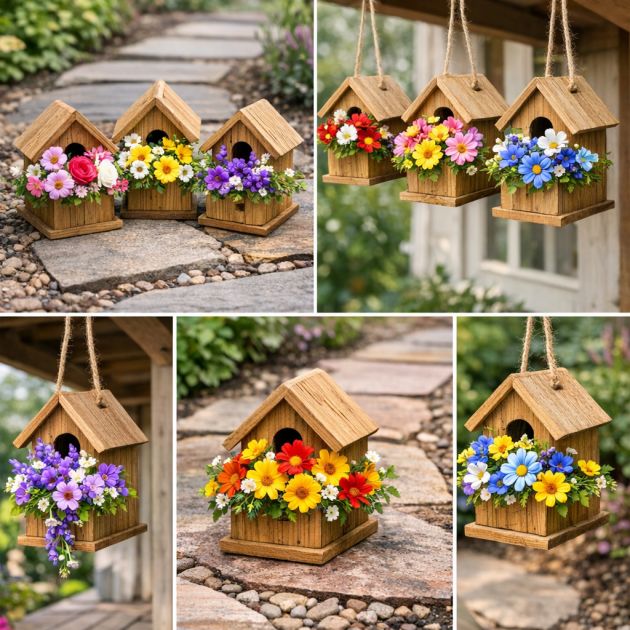
The image shows flowers concentrated across the lower front section, almost like a miniature window box.
That is one of the prettiest ways to create the effect.
Try to create a balanced arrangement rather than using identical flowers in perfectly even rows.
A slightly loose, natural-looking design usually looks more realistic.
Step 3: Mark the Hole Positions
Once you know where the stems will go, use a pencil to mark the wood.
Space the marks approximately according to the thickness of your flower stems.
You do not need dozens of holes.
A few strategically placed openings can hold enough flowers to create a full display.
For example, you might drill:
- Three to five holes across the front
- Two additional holes toward each side
- One or two holes for trailing greenery
The exact number depends on the size of your birdhouse and flowers.
Step 4: Drill the Holes Carefully
Put on protective eyewear before drilling.
Choose a drill bit slightly larger than the stems you plan to insert.
Drill slowly through each marked point.
You want an opening large enough for the flower stem, but not so large that the flower becomes loose.
If the wood begins to splinter, stop and adjust your drilling speed.
After drilling, use sandpaper to smooth rough edges around the openings.
This makes the project look cleaner and also prevents splinters.
Step 5: Paint or Stain the Birdhouse
This step is optional, but it can completely change the finished look.
You can leave the birdhouse as natural wood, as shown in the image, or add color.
Good options include:
- White for farmhouse decor
- Sage green for a garden look
- Soft blue for cottage style
- Natural brown stain
- Weathered gray
- Pale yellow
- Terracotta
- Distressed cream
If the birdhouse will be displayed outdoors, choose paint or stain suitable for exterior use.
Let it dry completely before adding flowers.
Step 6: Seal the Wood for Outdoor Use
If your decoration will remain outdoors, a clear outdoor sealer can help protect the wood.
Apply the sealer according to the manufacturer’s directions.
Pay particular attention to:
- The roof
- The base
- Exposed edges
- Drilled areas
Allow everything to dry completely before moving to the decorating stage.
Step 7: Trim the Artificial Flower Stems
Dollar-store flower bunches usually have long stems.
Use wire cutters or sturdy scissors to shorten them.
Leave enough stem to fit securely into the drilled holes.
A length of several inches is often enough.
You can mix different flowers for a more interesting effect.
For example:
- Daisies
- Mini roses
- Lavender
- Small chrysanthemums
- Wildflower-style blooms
- Tiny white filler flowers
- Artificial fern leaves
- Ivy
- Eucalyptus-style greenery
The image works particularly well because the arrangements combine several colors and flower shapes.
Step 8: Start With the Greenery
A useful decorating trick is to place greenery first.
Insert small leaves or trailing stems into several holes.
This creates a background for the colorful flowers.
Do not fill every space with greenery.
A few pieces are usually enough to soften the edges and make the flowers appear more natural.
Step 9: Add the Largest Flowers
Next, add the largest blooms.
These become the visual focal points.
Place them at slightly different heights instead of creating a perfectly straight line.
For example, put one larger flower near the center and two slightly smaller ones toward the sides.
This helps create a fuller, more organic arrangement.
Step 10: Fill the Gaps With Smaller Flowers
Once the larger flowers are positioned, use smaller flowers to fill empty areas.
Mix the colors so the arrangement does not look too repetitive.
A combination such as:
- Yellow
- White
- Pink
- Purple
- Blue
creates the colorful cottage-garden appearance seen in the image.
If you prefer a more elegant look, choose only two or three colors.
Step 11: Secure the Flowers
If the stems fit tightly into the drilled holes, they may stay in position without additional adhesive.
For a more permanent decoration, add a small amount of hot glue or outdoor craft adhesive around the stem.
Avoid using excessive glue.
A large blob can become visible and make the project look messy.
For outdoor decorations, weather-resistant adhesive is usually more durable than ordinary craft glue.
Step 12: Create the Hanging Version
The hanging birdhouses in the image add another layer of charm.
To make one, attach strong jute rope or outdoor cord to the roof or sides.
You can use:
- Small eye hooks
- Screw eyes
- Existing hanging holes
- A secure wooden support
Make sure the birdhouse hangs level before adding all the flowers.
If the decoration is heavy, use stronger hardware rather than relying only on glue.
Also consider wind exposure.
A lightweight hanging birdhouse can swing significantly during strong weather.
Step 13: Make a Freestanding Version
If you do not want to hang the birdhouse, simply place it on a stable surface.
Good locations include:
- Stone garden paths
- Porch steps
- Outdoor shelves
- Patio tables
- Wooden benches
- Garden walls
- Decorative crates
The three birdhouses displayed together in the top-left section of the image demonstrate how effective a grouped arrangement can be.
Three different flower combinations can look especially attractive.
Step 14: Use Different Color Themes
One of the easiest ways to make several birdhouses look different is to give each one its own color palette.
For example:
Pink Cottage Birdhouse
Use pink roses, white daisies, and pale greenery.
Purple Garden Birdhouse
Combine lavender, violet flowers, and small white filler blooms.
Sunny Yellow Birdhouse
Use yellow daisies, orange flowers, and white accents.
Blue-and-White Birdhouse
Use blue flowers, white daisies, and green leaves.
Autumn Birdhouse
Use orange, burgundy, cream, and muted greenery.
You can create a completely different display without changing the basic construction.
Variation 1: Add a Mini Window Box
Instead of drilling directly into the front of the birdhouse, attach a small wooden container below the opening.
Fill that miniature box with faux flowers.
This makes the birdhouse look like a tiny cottage with a flower box beneath the window.
It is an excellent option if you do not want to drill many holes into the main structure.
Variation 2: Add Moss
Artificial or preserved moss can make the decoration feel more natural.
Glue small amounts around:
- The flower base
- The front ledge
- The roof edges
- The bottom platform
Do not cover the entire birdhouse.
Small touches usually look more convincing.
Variation 3: Add a Tiny Sign
Attach a small wooden sign with words such as:
- Welcome
- Garden
- Bloom
- Home
- Spring
- Hello
- Grow
You can paint the sign by hand or use vinyl lettering.
This works particularly well for front porch decorations.
Variation 4: Make a Seasonal Birdhouse
The same project can be adapted throughout the year.
For spring, use pastel flowers.
For summer, use bright daisies and wildflowers.
For autumn, use orange, gold, burgundy, and miniature leaves.
For winter, replace flowers with pine sprigs, berries, and small pinecones.
One inexpensive wooden birdhouse can therefore become the base for several seasonal decorations.
Variation 5: Use Real Small Plants
If the birdhouse is sufficiently sturdy and modified for drainage, it can potentially be adapted into a tiny planter.
However, this requires more preparation than using artificial flowers.
You would need to consider:
- Drainage
- Water damage
- Soil weight
- Root space
- Wood protection
- Plant choice
Small succulents may work better than plants requiring constant moisture.
For most people, artificial flowers are much easier.
Why Artificial Flowers Work So Well
Real flowers are beautiful, but they require water, sunlight, and maintenance.
Artificial flowers offer several advantages for this particular DIY.
They are:
- Lightweight
- Inexpensive
- Easy to arrange
- Available in many colors
- Long-lasting
- Low-maintenance
- Easy to replace
They also make the project practical for shaded porches where real flowering plants might struggle.
How to Make Dollar Store Flowers Look More Expensive
Cheap artificial flowers can sometimes look obviously artificial, but a few tricks help.
First, avoid using an entire bunch exactly as purchased.
Separate the stems.
Mix flowers from different bunches.
Combine large blooms with small filler flowers.
Add greenery.
Bend the stems so the arrangement is not perfectly symmetrical.
You can also remove overly shiny plastic leaves if they make the arrangement look cheap.
A more varied arrangement usually looks far more convincing.
How Many Flowers Do You Need?
For a small birdhouse, one or two bunches may be enough.
For a fuller arrangement, use several types.
You might purchase:
- One bunch of large flowers
- One bunch of smaller flowers
- One bunch of greenery
Divide them among several birdhouses.
This can keep the overall cost surprisingly low.
Where to Display Them
These flower-filled birdhouses are extremely versatile.
Try placing them:
- Along a walkway
- Beside the front door
- Under a covered porch
- Hanging from porch beams
- On a balcony
- Along a garden fence
- On an outdoor table
- Beside flowerpots
- Near a garden shed
A row of three hanging birdhouses can create a particularly charming display.
Protecting the Project From Weather
Artificial flowers and wooden birdhouses can fade outdoors over time.
To make them last longer:
Keep them under partial shelter when possible.
Use outdoor-rated paint and sealer.
Choose UV-resistant artificial flowers if available.
Bring the birdhouses indoors during severe storms.
Avoid leaving lightweight hanging versions outside during strong winds.
A little protection can dramatically extend the life of the project.
Common Mistakes to Avoid
Drilling Holes That Are Too Large
If the holes are too wide, the stems will wobble.
Start small and enlarge only if necessary.
Using Too Much Glue
Visible glue can ruin the handmade appearance.
Use small amounts.
Overcrowding the Birdhouse
More flowers are not always better.
Leave some of the wood visible so the birdhouse shape remains part of the design.
Using Only One Type of Flower
A combination of shapes and sizes usually creates a more natural arrangement.
Hanging It With Weak String
Use secure cord and hardware, especially outdoors.
Forgetting About Weather Protection
Untreated wood can deteriorate surprisingly quickly when exposed to rain.
A Budget-Friendly Version
If you want to make the project as cheaply as possible, keep things simple.
Buy one unfinished birdhouse.
Use one mixed bunch of artificial flowers.
Use leftover exterior paint from another project.
Reuse jute rope or twine you already have.
You can create a beautiful decoration without turning it into an expensive craft project.
That is part of the appeal of this idea.
Turn It Into a Neighborhood Craft Day
This project is also well suited to a small group activity.
Set out several unfinished birdhouses, artificial flower bunches, paint, brushes, and glue.
Each person can create a different design.
Children can help with painting and flower selection, while an adult should handle drilling and other power-tool work.
At the end, everyone has a different decorative birdhouse to take home.
Why the Finished Project Looks So Charming
The birdhouse itself creates the feeling of a miniature home.
Adding flowers makes it resemble a tiny cottage surrounded by a garden.
That combination immediately creates a warm, cheerful look.
The natural wood also balances the bright flower colors, which is why the designs in the image feel colorful without becoming overwhelming.
It is rustic, playful, and easy to personalize.
Step-by-Step Quick Summary
For an easy reference, here is the entire process:
- Buy or reuse a decorative wooden birdhouse.
- Sand any rough edges.
- Decide where you want the flowers.
- Mark the hole positions.
- Drill small holes.
- Paint or stain the birdhouse if desired.
- Add exterior sealer if it will stay outside.
- Cut artificial flowers into individual stems.
- Insert greenery first.
- Add larger flowers.
- Fill spaces with smaller blooms.
- Secure loose stems with adhesive.
- Add rope or hooks for hanging if desired.
- Display the finished birdhouse in a protected outdoor area.
Final Thoughts
This DIY proves that some of the most attractive garden decorations do not require expensive materials or advanced crafting skills.
A basic wooden birdhouse and a few inexpensive artificial flowers can be transformed into a colorful piece that looks charming on a porch, garden path, balcony, or patio.
The secret is in the details: drill the holes carefully, mix several flower types, leave enough wood visible, and use greenery to make everything look fuller and more natural.
Make one, and you may quickly find yourself wanting a second.
Then a third.
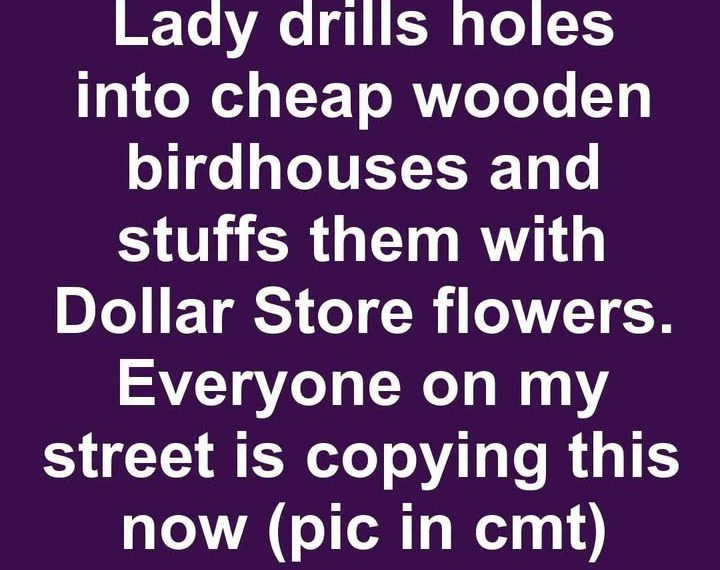
And before long, you may understand exactly why a whole street could start copying the idea.