Step 2: Start With the Outside of the Grille
Don’t immediately push a wet cloth through the grille.
First remove as much loose dust as possible.
Use your vacuum cleaner’s soft brush attachment over the front grille.
Move slowly across:
- The upper section
- The center
- The lower section
- The outer edges
- The sides of the grille
The brush loosens dust while the vacuum immediately collects it.
This is preferable to simply blowing compressed air into the fan because blowing can send dust deeper into the appliance.
For fans that cannot be disassembled, vacuuming the grille and vents is one of the recommended approaches for routine cleaning.
Step 3: Clean the Rear Grille
Don’t forget the back.
The rear grille is often one of the dirtiest areas because it is where the fan draws air into the appliance.
Use the vacuum brush attachment and slowly work across the entire rear grille.
Pay particular attention to:
- Horizontal slots
- Vertical slots
- Corners
- Areas around the motor housing
- Dust collected near the center
If you have a soft paintbrush, gently brush stubborn dust toward the vacuum nozzle.
Step 4: Remove Dust From the Blades
This is where the biggest improvement can often be seen.
If the blades are accessible through the grille, keep the fan unplugged and carefully rotate them by hand.
Move one blade into a comfortable position.
Use a soft brush to loosen dust from its surface.
Then vacuum the loosened dust.
Repeat the process for each blade.
Important:
Don’t force the blades.
If the grille prevents you from reaching them safely, don’t insert your fingers or tools deeply into the appliance.
A slightly longer flexible dusting brush can help reach difficult areas without taking the fan apart.
Step 5: Use a Microfiber Cloth for Sticky Dirt
Dry dust is usually easy to remove.
But after months of use, fan blades can develop a slightly sticky layer caused by dust mixing with humidity, household oils, and airborne particles.
A dry brush may not remove this completely.
Prepare a bowl containing:
Warm water + a few drops of mild dish soap
Dip your microfiber cloth into the solution and wring it out very well.
The cloth should be damp, not dripping wet.
Then gently wipe the accessible surfaces of the blades and grille.
Don’t spray the cleaning solution directly onto the fan.
Instead:
Apply the cleaner to the cloth → wring it out → wipe the surface.
This greatly reduces the possibility of liquid entering the motor or electrical components.
Never Spray Cleaner Directly Into the Fan
This is one of the most important mistakes to avoid.
Never spray:
- Water
- Glass cleaner
- Disinfectant
- Degreaser
- Alcohol
- Perfume
- Bleach
- Household cleaning sprays
directly through the grille.
Liquid can travel toward the motor, wiring, switches, or other electrical components.
Instead, put a small amount of appropriate cleaner on your cloth and carefully wipe accessible surfaces.
Manufacturer cleaning instructions similarly warn against allowing water to enter the interior of the fan.
Step 6: Clean the Motor Housing Carefully
The motor area requires special attention.
You do not need to wash it.
In fact, you shouldn’t.
Use:
- A dry microfiber cloth
- A soft brush
- A vacuum with a soft brush attachment
Gently remove dust from the outside of the motor housing and its ventilation openings.
If using compressed air, use short, controlled bursts rather than forcing large amounts of air deep into the motor.
Never pour water over the motor.
Never spray cleaner into the motor vents.
And don’t open the motor housing unless the manufacturer specifically provides instructions for doing so.
Step 7: Clean the Stand and Base
The base of a standing fan often collects more dust than people realize.
Wipe:
- The stand
- Height-adjustment areas
- Control panel
- Oscillation controls
- Base
- Power cord
Use a slightly damp microfiber cloth for washable exterior surfaces.
For electrical controls, use minimal moisture.
Then wipe everything with a dry cloth.
Step 8: Use a Toothbrush for Difficult Areas
A soft, clean toothbrush can be surprisingly useful.
It can reach:
- Small grille openings
- Corners
- Around buttons
- Narrow spaces around the base
- Dust trapped around the outer edge of the motor housing
Use gentle strokes.
Don’t press the brush deep inside the appliance.
The goal is to loosen surface dirt—not push it farther into the fan.
Step 9: Vacuum Everything Again
Once you’ve brushed and wiped the fan, give it another pass with the vacuum.
This second pass removes dust that became loose during cleaning.
Concentrate on:
Front grille → blades → rear grille → motor vents → base
This two-stage method works particularly well:
Brush → vacuum → wipe → vacuum again
It minimizes the amount of dust left behind.
Step 10: Let Everything Dry Completely
If you used a damp cloth, don’t immediately plug the fan back in.
Allow the cleaned surfaces to dry completely.
This is especially important around the grille and blade area.
Never reconnect an electrical appliance while moisture remains where it shouldn’t.
Manufacturers commonly specify that washable components must be completely dry before the fan is reassembled or returned to service.
How to Clean the Fan Without Removing Anything
If you want the quickest possible method, use this routine:
1. Unplug the fan.
2. Vacuum the front grille.
3. Vacuum the rear grille.
4. Use a soft brush to loosen dust around the blades.
5. Vacuum the loosened dust.
6. Wipe accessible plastic surfaces with a barely damp microfiber cloth.
7. Clean the base and controls.
8. Wipe everything dry.
9. Allow moisture to evaporate completely.
10. Plug the fan back in and test it.
This won’t provide the same deep cleaning as removing the grille and blades, but it’s an excellent routine-maintenance method when you don’t want to disassemble the appliance.
What If the Fan Is Extremely Dirty?
If the fan has not been cleaned for years, an external cleaning may not be enough.
You may eventually need to remove the grille and blades—but only if your particular model is designed to be opened and the manufacturer’s instructions allow it.
Many traditional pedestal and table fans have removable grilles, while some tower fans and other models are designed to remain closed.
Don’t force a grille that doesn’t want to come off.
Some manufacturers specifically instruct users not to open certain fan designs.
How Often Should You Clean a Fan?
The ideal frequency depends on your environment.
Light use
Every 1–2 months may be sufficient.
Frequent summer use
A quick cleaning every few weeks is a good idea.
Homes with pets
More frequent cleaning may be necessary because hair and dander accumulate quickly.
Dusty environments
Check the grille regularly and clean it whenever you see a visible layer of dust.
A fan used in a dusty room can become dirty much faster than one used occasionally in a relatively clean room. Regular cleaning can also help prevent dust from continually being redistributed around the room.
A Simple Trick to Keep the Fan Cleaner for Longer
The best cleaning method is actually prevention.
Before turning the fan on for the season:
- Give it a thorough cleaning.
- Vacuum the surrounding floor and furniture.
- Keep the fan away from obvious sources of dust.
- Don’t place it directly beside fabrics that shed lint.
- Check the grille periodically.
The less dust that enters the grille, the less frequently you’ll need to clean the fan.
Common Mistakes to Avoid
Don’t clean while plugged in
Always disconnect the power first.
Don’t spray water directly onto the fan
Moisture can reach electrical components.
Don’t use harsh solvents
They can damage plastic and finishes.
Don’t force the grille open
Check the manufacturer’s instructions first.
Don’t push dust deeper inside
Use a vacuum alongside your brush whenever possible.
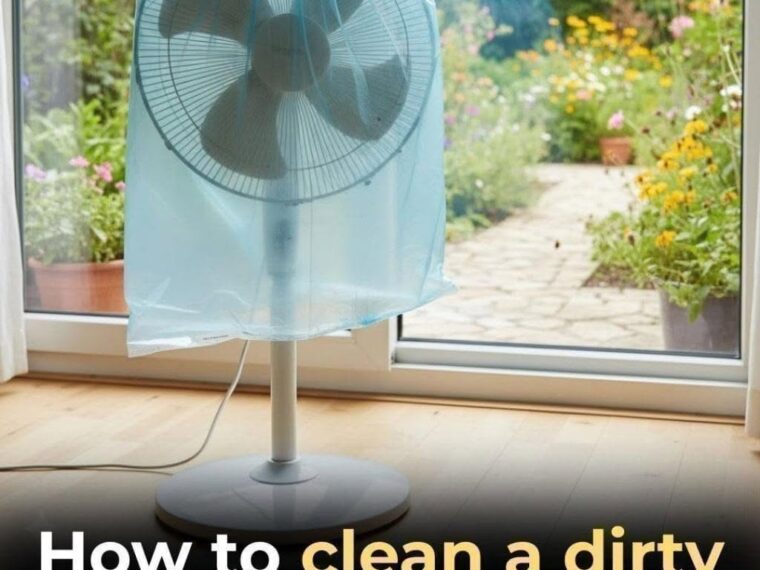
Don’t cover a running fan with a plastic bag
The viral image may look convenient, but there is no need to introduce the additional risk of obstructing airflow or allowing plastic to interact with a moving appliance.
Don’t plug the fan in while it is still wet
Let cleaned surfaces dry completely first.
What About Compressed Air?
Compressed air can be useful for difficult-to-reach areas, but it should be used carefully.
Short bursts can loosen dust around vents and grilles.
However, simply blasting compressed air into a dirty fan can push dust deeper into the appliance.
A better approach is to position a vacuum near the area you’re cleaning so that loosened dust is captured rather than redistributed.
For routine cleaning, a vacuum + soft brush is often enough.
The Result: A Cleaner, Quieter Fan
After removing years of accumulated dust, you may notice several differences.
The grille looks cleaner.
The blades have less buildup.
Air can move more freely through the openings.
The fan may sound smoother.
And, perhaps most importantly, you’re no longer repeatedly blowing a layer of accumulated dust around the room.
Cleaning experts also note that dust buildup on blades and behind grilles can affect airflow and redistribute dust when the fan operates.
Final Thoughts
The plastic-bag method shown in the image is certainly attention-grabbing, but you don’t need to run a fan inside a plastic bag to clean it.
A safer and more reliable approach is surprisingly simple:
Unplug → vacuum → brush → wipe → vacuum again → dry completely.
For light or moderate dirt, this can clean a standing fan effectively without removing the grille or blades.
And when the fan eventually needs a deeper cleaning, follow the instructions for your specific model rather than forcing it apart.
Your fan doesn’t need expensive cleaning products or complicated tricks. A vacuum, a soft brush, a microfiber cloth, and a few minutes of careful work can make a remarkable difference.