Step 1: Form the Floating Ring
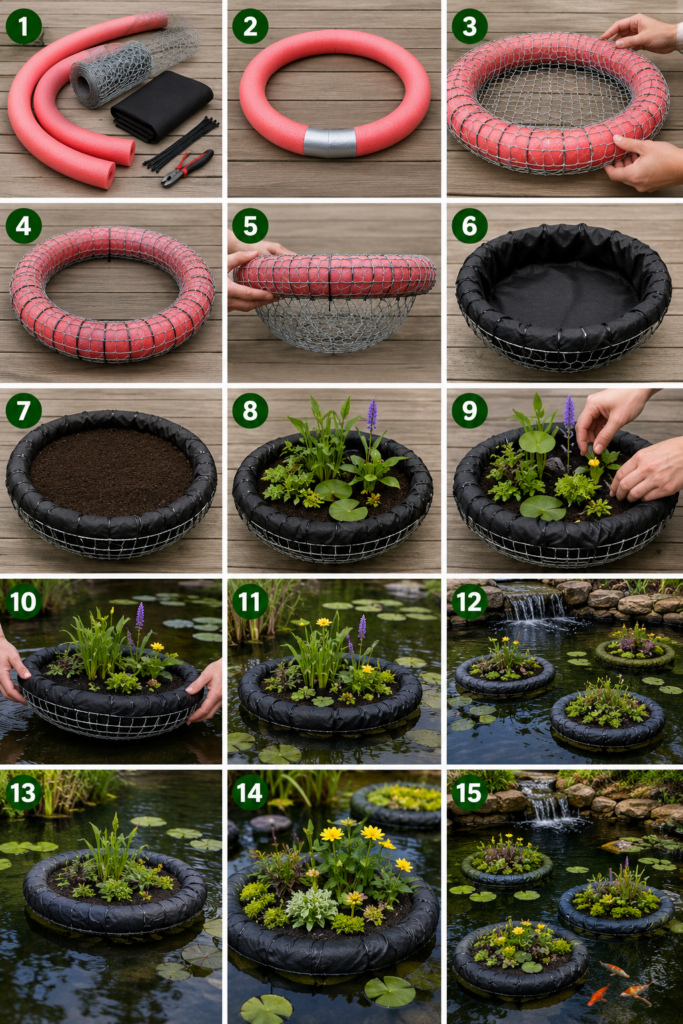
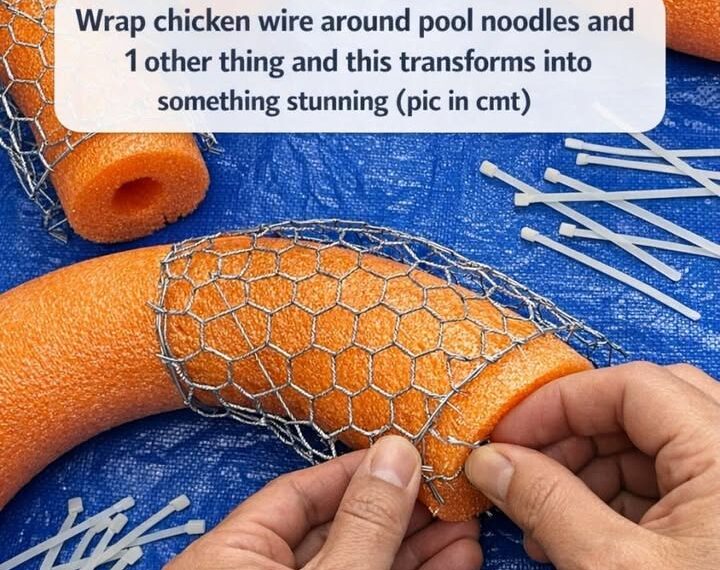
Take a pool noodle and bend it into a circle.
Bring both ends together.
Secure them tightly using waterproof duct tape, a plastic connector, or a short piece of PVC pipe inserted into both ends.
The larger the ring, the larger your floating island will be.
Step 2: Wrap the Pool Noodle with Chicken Wire
Lay the chicken wire flat.
Place the noodle circle on top.
Wrap the wire completely around the outside of the noodle.
Fold the edges neatly.
Secure everything using zip ties every few inches.
The chicken wire acts as the frame that keeps the island rigid.
Step 3: Create the Bottom Basket
Continue extending the chicken wire beneath the circle.
Fold it inward to create a shallow basket underneath the ring.
Secure all overlapping sections with zip ties.
This basket will hold the soil and plants.
Step 4: Add Landscape Fabric
Cut a large piece of landscape fabric.
Place it inside the chicken wire basket.
Press it into the shape of the basket.
Fold the excess fabric over the wire edges.
Secure it with additional zip ties.
The fabric keeps the soil from washing into the pond while still allowing water to circulate.
Step 5: Fill with Aquatic Soil
Add heavy aquatic planting soil.
Avoid lightweight potting mix because it floats.
Fill the basket until it is almost level with the top of the ring.
Lightly press the soil to remove air pockets.
Step 6: Arrange Your Plants
Now comes the fun part.
Arrange your favorite aquatic plants before planting them permanently.
Combine plants with different heights and textures.
For example:
Center:
- Pickerel weed
- Dwarf iris
- Papyrus
Middle:
- Marsh marigold
- Water mint
Edges:
- Creeping Jenny
- Moss
- Trailing aquatic plants
For larger islands, add a dwarf water lily near one side.
Step 7: Plant Everything
Carefully remove each plant from its nursery pot.
Loosen the roots slightly.
Plant each specimen firmly into the aquatic soil.
Cover any exposed soil with moss or decorative gravel to reduce erosion.
Step 8: Test the Floating Island
Lower the finished planter gently into the pond.
The pool noodle provides buoyancy while the basket hangs just below the water’s surface.
Adjust the balance if one side sits lower than the other.
Step 9: Anchor if Necessary
If you don’t want the island drifting freely, tie a length of fishing line or nylon cord to the bottom.
Attach the other end to a rock resting on the pond floor.
This allows gentle movement while keeping the island in place.
Step 10: Watch It Grow
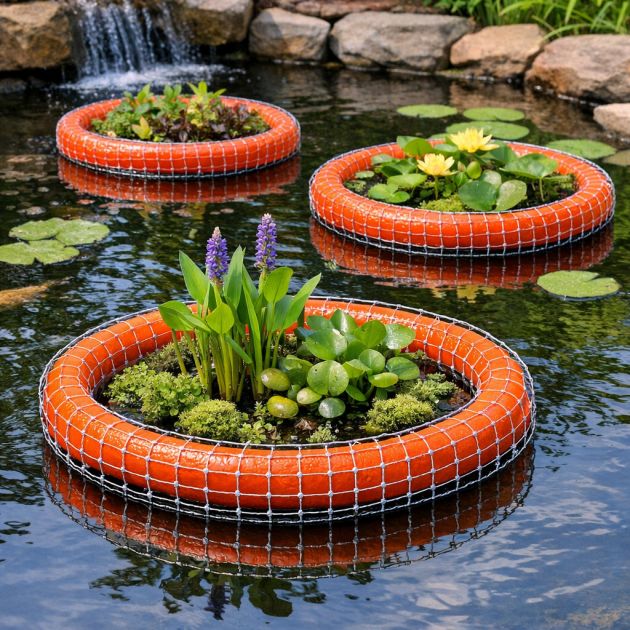
Within just a few weeks, the roots begin extending beneath the island into the pond.
The plants become fuller, flowers bloom, and the floating island starts looking like a natural part of the landscape.
Best Plants for Floating Islands
Excellent choices include:
Flowering Plants
- Water lilies
- Pickerel weed
- Marsh marigold
- Blue flag iris
Trailing Plants
- Creeping Jenny
- Water mint
- Moneywort
Texture Plants
- Papyrus
- Dwarf cattails
- Sweet flag
- Corkscrew rush
Benefits Beyond Beauty
Floating islands do much more than enhance your pond’s appearance.
They also:
- Help reduce algae by blocking sunlight.
- Absorb excess nutrients from the water.
- Provide shelter for fish from predators.
- Offer resting places for frogs and beneficial insects.
- Improve oxygen levels through healthy plant growth.
- Create natural habitats for pond wildlife.
Maintenance Tips
To keep your floating planter looking its best:
- Remove dead leaves regularly.
- Divide overcrowded plants every year or two.
- Add aquatic fertilizer tablets during the growing season if needed.
- Check zip ties annually and replace any that become brittle.
- Remove tropical plants before winter in cold climates.
- Rinse away debris if algae begins collecting around the island.
Creative Variations
Once you’ve mastered the basic design, you can customize your floating islands in countless ways:
- Create different-sized islands for a natural look.
- Add solar floating lights for a magical nighttime display.
- Mix flowering plants with ornamental grasses.
- Build several islands connected by hidden fishing line.
- Create a floating herb garden for decorative water features.
- Design themed islands with only purple, white, or tropical plants.
Final Thoughts
This clever DIY proves that a few inexpensive materials can produce a truly breathtaking garden feature. By combining a simple pool noodle, chicken wire, landscape fabric, and beautiful aquatic plants, you can create floating islands that look like they came straight from a professional botanical garden.
Whether you place one island in a small backyard pond or several across a large water feature, these floating gardens instantly add movement, color, and life to your outdoor space. Best of all, they’re affordable, easy to build, and endlessly customizable—making them a project that both beginner and experienced gardeners will enjoy for years to come.