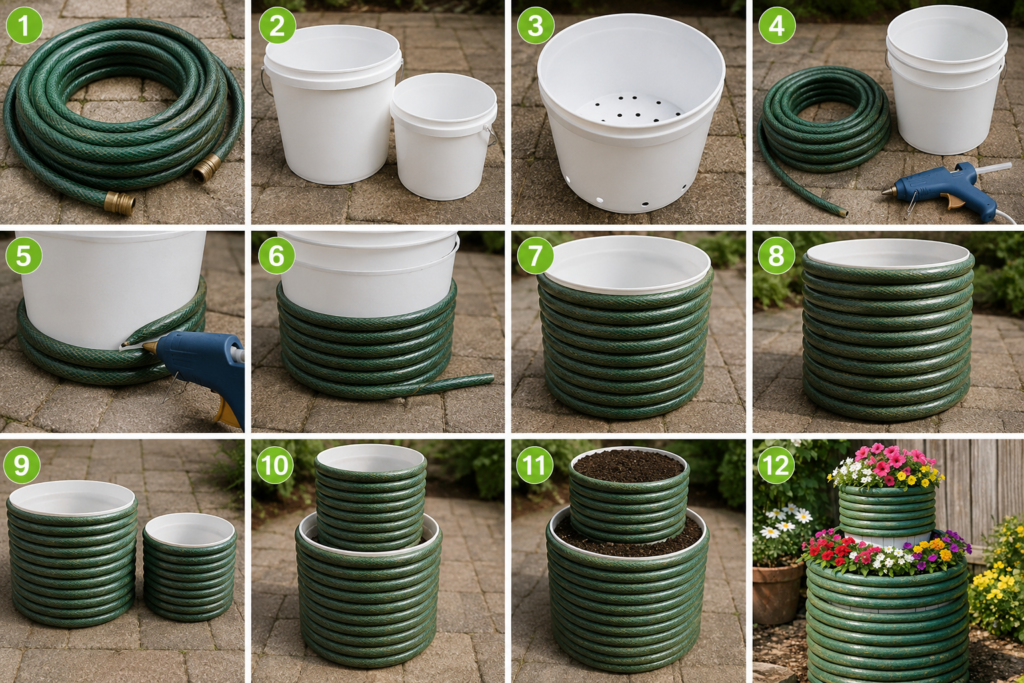
Step 1: Clean the Garden Hose
Before starting:
- rinse dirt from the hose
- let it dry completely
- cut away damaged connectors if needed
Flexible hoses are easier to wrap tightly around containers.
Step 2: Prepare the Buckets
Make drainage holes in the bottom if they don’t already have them.
Good drainage prevents:
- root rot
- mold
- soggy soil
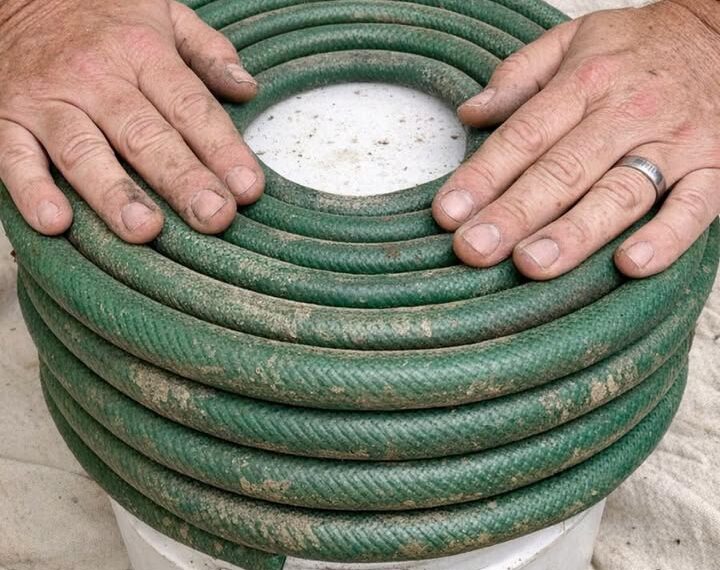
Step 3: Start Wrapping the Hose
This is where the transformation begins.
Starting at the bottom:
- Apply glue to the bucket
- Press the hose firmly into place
- Wrap slowly in even circles
- Continue upward until fully covered
The coiled texture creates a unique decorative look that resembles expensive outdoor pottery.
Step 4: Secure the Hose Properly
For extra durability:
- use outdoor adhesive
- add hidden zip ties if needed
- press sections tightly together
Allow everything to dry completely before moving the planter.
Step 5: Stack the Containers
Place the smaller container securely on top of the larger one.
You can:
- glue them together
- screw them together
- keep them separate for easier moving
The stacked arrangement creates a dramatic vertical garden effect.
Step 6: Add Soil and Flowers
Now comes the fun part.
Fill both containers with:
- quality potting soil
- compost if desired
Then plant colorful flowers around the edges.
Great choices include:
- petunias
- marigolds
- begonias
- calibrachoa
- pansies
Trailing flowers create an especially beautiful overflowing appearance.
Why the Finished Result Looks Expensive
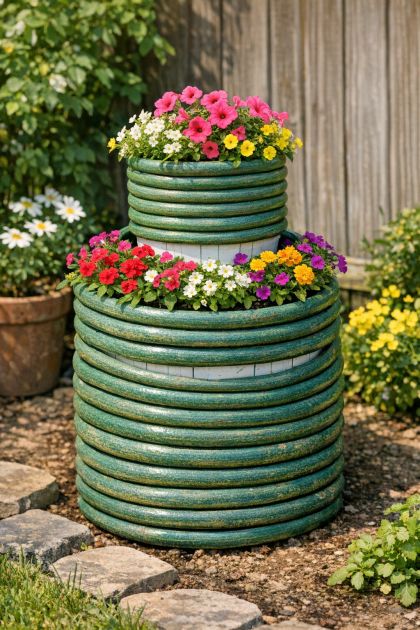
The wrapped hose creates a textured pattern similar to:
- ceramic garden art
- modern outdoor décor
- woven planters
- luxury landscape pieces
Most people never guess it’s made from recycled materials.
Extra Creative Ideas
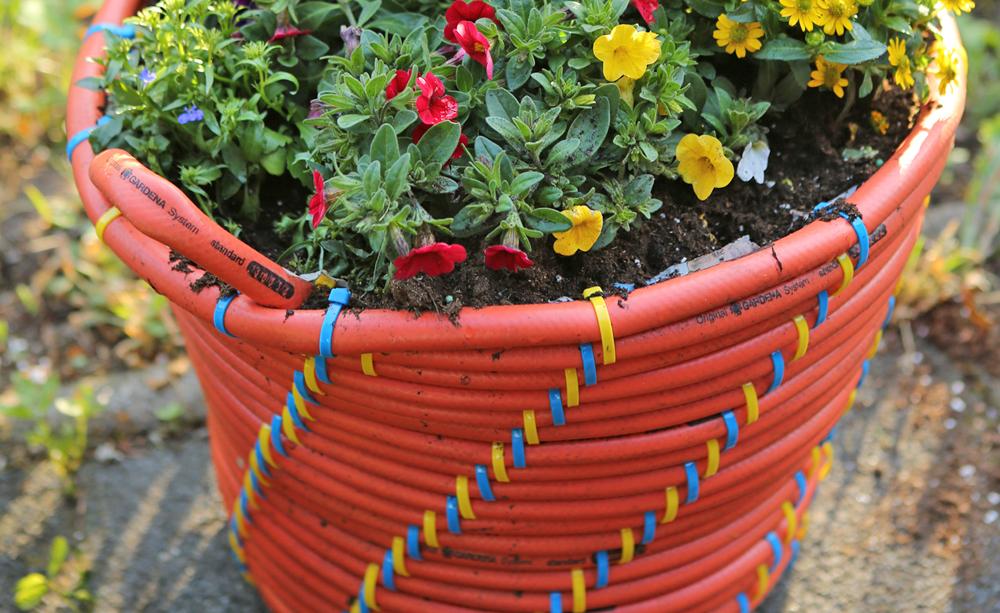
Once you master the basic design, you can customize it.
Paint the Hose
Spray paint can create:
- stone effects
- metallic finishes
- rustic styles
Add Solar Lights
Tiny solar lights around the planter make it glow beautifully at night.
Create Multiple Levels
Using three containers instead of two creates an even more dramatic display.
Best Plants for This Style of Planter
Because it’s a raised container system, plants that thrive include:
- flowers
- herbs
- strawberries
- succulents
- decorative grasses
Why Gardeners Love Upcycling Projects
DIY garden projects like this are satisfying because they:
- reduce waste
- save money
- encourage creativity
- make gardens unique
Every finished piece looks slightly different and personal.
Final Thoughts
This clever project proves that beautiful garden décor doesn’t have to be expensive. With an old garden hose, a few buckets, and some creativity, you can create a stunning layered planter that looks professionally made.
It’s simple, affordable, and guaranteed to surprise anyone who discovers what it’s actually made from.