
Step 1: Prepare the Wooden Hoop
Begin by cleaning your wooden hoop or wreath ring.
Inspect it for:
- Rough spots
- Splinters
- Loose joints
If desired, lightly sand the surface.
You can leave the wood natural for a rustic appearance or stain it to match your porch décor.
Allow any stain or paint to dry completely before moving on.
Step 2: Wrap the Fairy Lights Around the Hoop
Take your strand of warm white fairy lights and begin wrapping it evenly around the hoop.
Try to distribute the lights uniformly across the entire circle.
Secure the wire using:
- Small dabs of hot glue
- Clear zip ties
- Floral wire
Keep the battery pack positioned where it can be easily hidden later.
The lights will eventually create a glowing halo effect around the flowers.
Step 3: Plan Your Flower Arrangement
Before attaching anything permanently, lay out your flowers on a table.
Separate them into:
- Long stems
- Medium stems
- Short stems
Mixing lengths creates the cascading appearance seen in high-end floral installations.
Arrange colors evenly throughout the design to prevent one side from appearing heavier than the other.
This planning stage saves a lot of adjustment later.
Step 4: Cut Flower Stems to Different Lengths
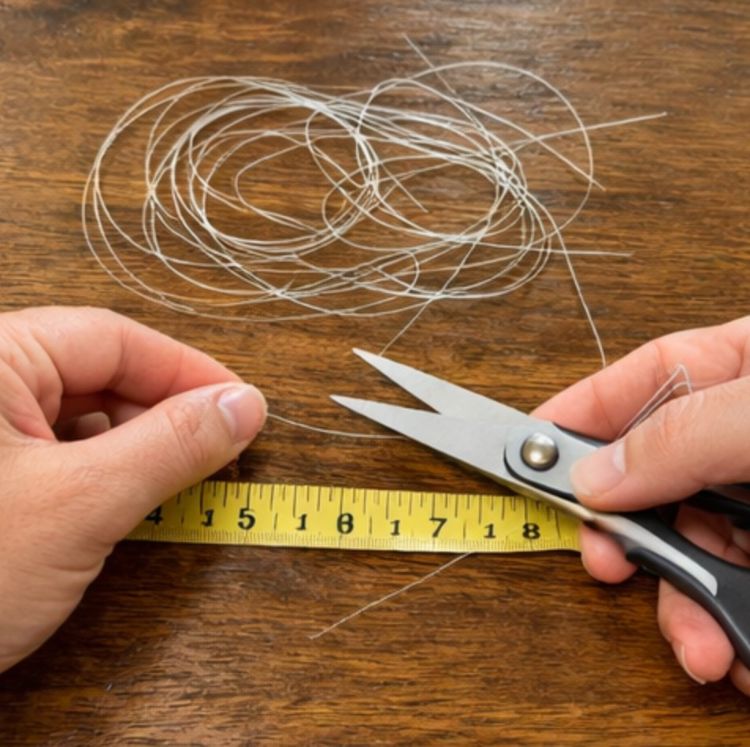
Using wire cutters, trim your artificial flowers.
Create several groups:
- 8-inch stems
- 12-inch stems
- 16-inch stems
- 20-inch stems
The variation helps create movement and visual interest.
When suspended from the hoop, the flowers will appear to float naturally at different heights.
Step 5: Attach Fishing Line to Each Flower
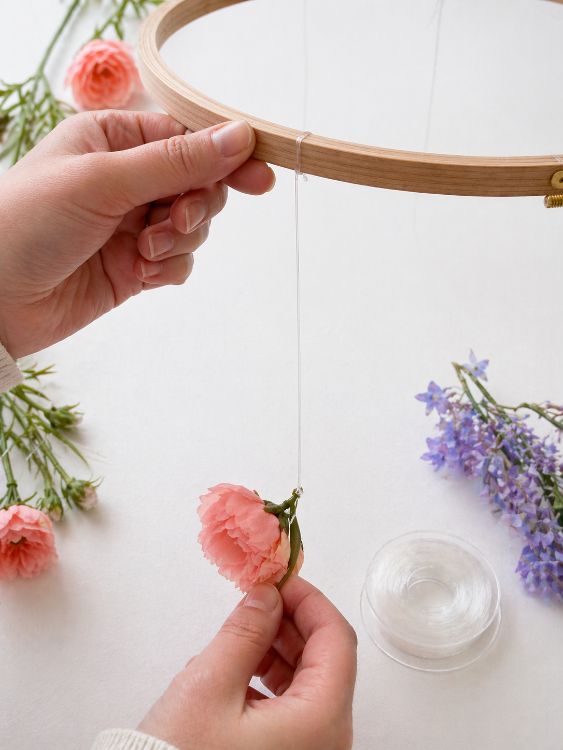
Cut pieces of clear fishing line in varying lengths.
Tie one piece securely around each flower stem.
The transparent line helps create the illusion that flowers are floating beneath the hoop.
Double-knot each attachment to ensure the flowers remain secure.
Step 6: Hang Flowers Upside Down
Begin attaching the flowers around the hoop.
Tie the fishing line to the wooden ring so the flower heads point downward.
Alternate:
- Flower types
- Colors
- Lengths
Step back frequently to check the balance of the arrangement.
The goal is a full, flowing design rather than perfectly symmetrical rows.
Step 7: Fill Empty Spaces
After attaching the main flowers, you may notice small gaps.
Fill these areas with:
- Lavender sprigs
- Greenery
- Baby’s breath
- Hanging vines
These filler elements soften the overall appearance and make the display look more luxurious.
They also help hide attachment points.
Step 8: Conceal the Fairy Light Wiring
Carefully tuck portions of the light wire behind flowers and greenery.
The lights should appear integrated into the design rather than sitting on top of it.
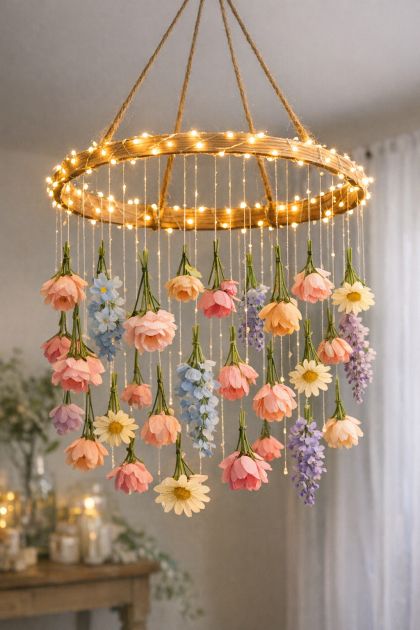
At night, the tiny bulbs will create a magical glowing canopy around the hanging flowers.
Step 9: Create the Hanging System
Cut three equal lengths of twine or rope.
Attach them evenly around the hoop.
Bring the three strands together at the top and tie a strong knot.
This creates a balanced suspension system that allows the chandelier to hang level.
Test the balance before installation.
Step 10: Hang and Adjust
Install a sturdy hook on your porch ceiling, pergola, patio cover, or indoor ceiling.
Hang the chandelier and make final adjustments.
Rotate flowers as needed.
Spread out clusters that appear too dense.
Straighten any stems that became twisted during installation.
Once complete, turn on the fairy lights and enjoy the transformation.
Styling Ideas for Different Seasons
One reason people love this project is its versatility.
Spring
Use:
- Cherry blossoms
- Tulips
- Daisies
- Pastel roses
Summer
Choose:
- Sunflowers
- Wildflowers
- Bright peonies
- Lavender
Fall
Incorporate:
- Orange flowers
- Eucalyptus
- Faux leaves
- Small pumpkins
Winter
Use:
- White roses
- Pine branches
- Frosted greenery
- Warm white lights
A single hoop can be redecorated throughout the year.
Best Places to Display Your Floral Chandelier
This project isn’t limited to porches.
It looks beautiful in:
- Covered patios
- Gazebos
- Dining rooms
- Bedrooms
- Wedding venues
- Baby showers
- Garden parties
- Sunrooms
Anywhere you want a touch of elegance and whimsy.
Common Mistakes to Avoid
Many beginners make a few simple errors.
Avoid:
- Using flowers all the same length
- Overcrowding one side
- Choosing weak hanging rope
- Leaving the battery pack visible
- Using cool-toned lights instead of warm lights
- Forgetting to test balance before hanging
Small adjustments make a huge difference in the final appearance.
Why Everyone Wants One
This project perfectly combines affordability, creativity, and beauty. Most people assume such a floral chandelier requires professional design skills or expensive materials, but the reality is surprisingly simple.
For less than the cost of a dinner out, you can create a glowing floral centerpiece that transforms an ordinary porch into a magical retreat. As evening falls and the fairy lights begin to sparkle among the hanging blooms, it’s easy to understand why neighbors stop, stare, and ask how it was made.
The finished piece feels romantic, welcoming, and completely unique—exactly the kind of DIY project that inspires everyone who sees it to make one of their own.
Final Thoughts
A wooden hoop, a handful of dollar-store flowers, and a strand of fairy lights may not seem like much on their own. But when combined thoughtfully, they become a breathtaking floral chandelier that looks far more expensive than it actually is.
Whether you’re decorating your porch, planning a special event, or simply adding charm to your home, this upside-down flower chandelier is proof that some of the most beautiful décor ideas come from the simplest materials and a little creativity.