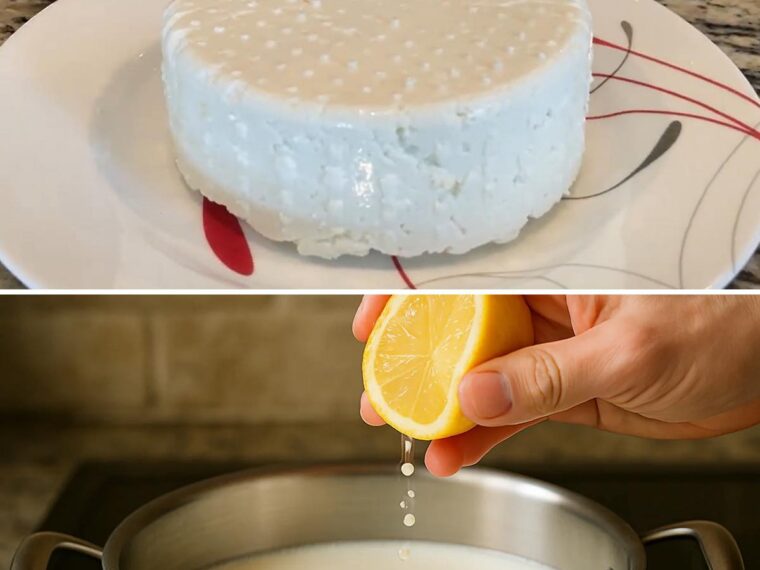
2. Add the Lemon Juice
Remove the pot from the heat. Slowly add the lemon juice while gently stirring.
Within seconds, the milk will begin to separate into curds (solid white pieces) and whey (a yellowish liquid)—just like in the image.
If the milk doesn’t fully separate, add a little more lemon juice and wait another minute.
3. Let It Rest
Cover the pot and let it sit for 10–15 minutes. This allows the curds to fully form and firm up.
4. Strain the Curds
Line a colander with cheesecloth and place it over a bowl.
Carefully pour the mixture into the colander. The whey will drain away, leaving the fresh cheese behind.
5. Shape and Press (Optional)
Gather the cloth and gently squeeze out excess liquid.
For a soft cheese, drain for 10–15 minutes.
For a firmer cheese, place a small weight on top and let it drain for 30–60 minutes.
Flavoring Your Fresh Cheese
Once drained, you can customize your cheese:
- Add salt for a classic taste
- Mix in herbs like parsley, thyme, or chives
- Add garlic, black pepper, or chili flakes
- Drizzle with olive oil for extra richness
How to Use Fresh Cheese
Homemade fresh cheese is incredibly versatile:
- Spread on toast or crackers
- Crumble over salads
- Use in sandwiches and wraps
- Add to pasta or rice dishes
- Serve with honey, olives, or fresh vegetables
Storage Tips
- Store in an airtight container in the refrigerator
- Best consumed within 3–4 days
- Keep a little whey or olive oil on top to maintain moisture
Final Thoughts
As shown in the image, making fresh cheese at home is a simple, natural process that transforms milk into something delicious with just a splash of lemon juice. It’s economical, satisfying, and gives you full control over taste and texture. Once you try it, you’ll realize that fresh, homemade cheese is not only easy—it’s truly worth it. 🧀✨