Whether you’re trimming roses, deadheading flowers, or cutting back overgrown shrubs, sharp and clean pruning shears are essential for healthy plants and effortless gardening. Over time, your shears can become dull, rusty, and coated in sap, making them less effective and even damaging to plants. The good news? Cleaning and sharpening them is easier than you think.
Here’s a complete, step-by-step guide to restoring your pruning shears to like-new condition.
Why Cleaning and Sharpening Matters
Before we jump into the how-to, let’s understand the why:
- Plant Health: Dirty or dull blades can crush stems rather than cutting cleanly, increasing the risk of infection or disease.
- Ease of Use: Sharp blades reduce strain on your hands and wrists.
- Tool Longevity: Regular maintenance extends the life of your tools and keeps them in top shape.
What You’ll Need
- Warm water and dish soap
- Steel wool or a wire brush
- A clean cloth or towel
- Rubbing alcohol or white vinegar
- A sharpening tool (sharpening stone, carbide sharpener, or fine metal file)
- Lubricating oil (such as WD-40, linseed oil, or vegetable oil)
- Gloves and safety glasses (optional but recommended)
Step 1: Disassemble the Shears (If Possible)
Some pruning shears come apart easily. If yours do, take them apart to get better access to the blades. If not, that’s okay—just be extra careful when handling them.
Step 2: Clean Off Dirt and Sap
- Mix warm water with a few drops of dish soap.
- Use a sponge, brush, or steel wool to scrub away any dirt, plant residue, or sticky sap.
- For tough sap, soak the blades in white vinegar for 15–30 minutes or wipe them with rubbing alcohol.
- Dry the shears completely with a clean towel.
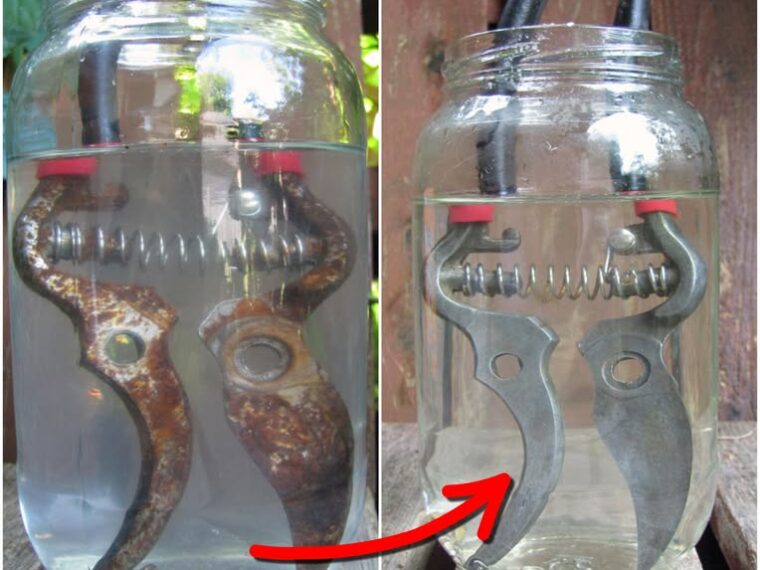
Step 3: Remove Rust (If Needed)
If your shears have rust:
TO CONTINUE READING THE ARTICLE PLEASE SEE PAGE 2