Most people look at old wooden picture frames and think they’re useless… so they throw them away.
But what if I told you that just 4 old frames tied together at the corners can turn into something incredibly useful and beautiful?
This simple DIY trick is going viral because it transforms forgotten items into a stunning and practical home or garden piece—and it costs almost nothing.
This article may contain affiliate links. If you purchase through these links, we may earn a small commission at no extra cost to you.
What Happens When You Tie 4 Frames Together?
When you connect four wooden frames at the corners, you create a freestanding 3D structure that can be used in multiple creative ways.
Depending on how you decorate it, it can become:
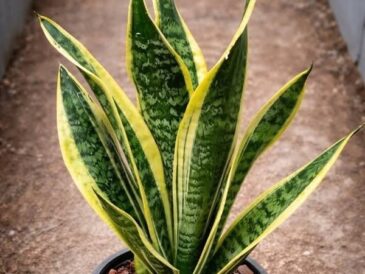
- A mini greenhouse for plants 🌿
- A decorative lantern ✨
- A table centerpiece
- A photo display cube
- A fairy light decor piece
- A small indoor garden frame
It’s simple, clever, and surprisingly stylish.
Why This DIY Idea Is So Smart
This project is popular because it is:
- Budget-friendly (you can find frames for cheap or free)
- Eco-friendly (recycling old items)
- Easy to make (no advanced skills needed)
- Customizable (you can design it however you want)
Many DIY lovers use a hot glue gun or strong wood adhesive to make the structure stable and long-lasting.
Materials You Will Need
To make this project, you’ll need:
- 4 wooden picture frames (same size works best)
- Strong glue or wood adhesive
- Twine, zip ties, or small screws
- Decorative items (optional):
- Fairy lights
- Small plants
- Candles
- Artificial flowers
- Fabric or mesh
A lot of people prefer using a hot glue gun kit and durable wood glue because they make the assembly faster and stronger—especially if you want your structure to last.
Step-by-Step Instructions
Step 1 – Choose Your Frames
TO CONTINUE READING THE ARTICLE PLEASE SEE PAGE 2