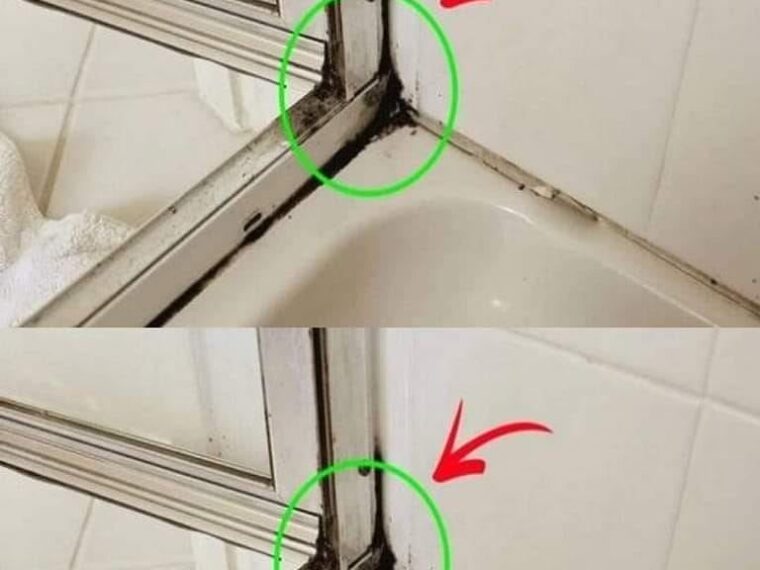
Silicone sealant in showers provides a perfect environment for mildew:
- Constant moisture from water usage.
- Limited airflow, which traps humidity.
- Soap residue and other organic matter that provide food for mildew.
Materials You’ll Need
To tackle mildew effectively, gather the following:
- White vinegar or hydrogen peroxide
- Baking soda
- Old toothbrush or scrubbing brush
- Cotton pads or paper towels
- Plastic scraper (optional)
- Gloves for protection
- A spray bottle
- Mildew-resistant silicone (if replacement is needed)
Step-by-Step Guide
1. Identify the Extent of the Mildew
Examine the silicone to determine how deeply the mildew has penetrated. Surface-level mildew is easier to remove, while mildew embedded in the sealant might require replacement.
2. Use Vinegar or Hydrogen Peroxide
- Fill a spray bottle with white vinegar or hydrogen peroxide (do not mix the two).
- Spray generously on the affected areas.
- Allow it to sit for 15–20 minutes to break down the mildew.
3. Scrub the Silicone
- Use an old toothbrush to scrub the silicone.
- Focus on the black or discolored spots to lift the mildew.
- If needed, mix baking soda with a small amount of water to form a paste and use it as a gentle abrasive.
4. Apply a Soaking Method for Stubborn Mildew
- For mildew that doesn’t come off with scrubbing, soak the area:
- Dampen cotton pads or paper towels with vinegar or hydrogen peroxide.
- Press them firmly onto the silicone and leave them for 1–2 hours.
- Remove the pads and rinse the area.
5. Rinse and Dry Thoroughly
- Use warm water to rinse away any residue.
- Dry the silicone with a clean towel to remove excess moisture.
What If the Mildew Persists?
If the mildew has penetrated deeply into the silicone and won’t come out with cleaning, consider these steps:
TO CONTINUE READING THE ARTICLE PLEASE SEE PAGE 2


