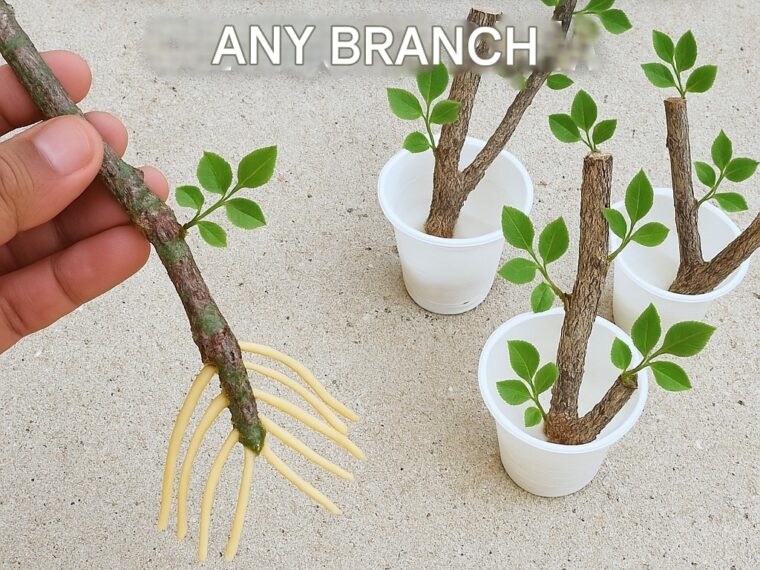
Step 1: Choose the Right Branch
Select a healthy, disease-free branch about 4–6 inches long. Look for green, flexible stems with several leaf nodes.
Step 2: Cut and Trim
Use a sterilized knife to make a 45° angle cut just below a leaf node. Remove the leaves from the lower half of the cutting.
Step 3: Dip in Honey
Pour a small amount of honey into a bowl. Dip the cut end of the branch into the honey, ensuring it’s well-coated.
🍯 Tip: Let the cutting sit for 5–10 minutes to allow the honey to adhere properly.
Step 4: Plant the Cutting
- In Soil: Insert the treated end into moist, well-draining potting mix.
- In Water: Place the cutting in a jar of clean water, changing the water every 2–3 days.
Step 5: Provide Ideal Conditions
- Place in a warm, bright location (indirect sunlight)
- Keep the soil or water moist (but not soggy)
- Cover with a plastic bag (optional) to maintain humidity
⏳ When to Expect Roots
Rooting time depends on the plant species. On average, you’ll see root development in 2 to 4 weeks. Gently tug the cutting to check for resistance — a sign that roots have formed.
🌿 Best Plants to Propagate with This Technique
- Rosemary
- Basil
- Mint
- Roses
- Hydrangeas
- Figs
- Pothos
- Tomatoes
- Lavender
🧠 Bonus Tips for Success
- Always use clean tools to prevent infections
- Avoid direct sunlight during the early rooting stage
- Use rainwater or distilled water if your tap water is heavily chlorinated
- You can mix honey with a bit of cinnamon for added antifungal properties
✅ Why This Technique Stands Out
Using honey as a rooting aid is:
- Natural
- Affordable
- Non-toxic
- Effective on a wide variety of plants
It’s a perfect alternative for people avoiding synthetic rooting powders or looking for an eco-friendly solution.
📣 Conclusion
This one-ingredient technique using honey is a game-changer for gardeners who love propagating plants. It’s easy, cheap, and surprisingly effective. Try it once, and you’ll be amazed at how well your cuttings thrive!